Once wound around your enamel, mark and cut as if you are making a large jump ring. IF you cut carefully, you will have a nice seam to solder.
The square wire is slightly twisted on the spool so you may have to twist it flush to make sure your seam is straight. Try to make the seam as straight as possible before you solder.
Use hard solder!
I usually over flux and then wipe it off with my finger. Make sure you wash your hands before you pick your nose or eat a sandwich.
Place a small chip of solder so it crossed the seam. Heat up slowly. Let the moisture from the flux evaporate slowly. If you heat it up too fast the flux will boil and the chip will fall off.
Once soldered, pickle it, dry it off and then shape it on the cone mandrel. Again, this is your opportunity to remove the twist. Hammer down on the mandrel so make it flush.
If there is still a twist in the metal use the fancy stomping thing (AKA the stationary planishing hammer) to make it dean flat. Watch out for your fingers!
At this point you may have to file it flush on a flat surface.
I like to file it round on the cone mandrel so I do not get too carried away you may file a flat spot on your piece.
I have stuck a large sanding disc to a tile so you can sand objects flat.
Test fit you frame to check to see if it is flush with your enamel. If it is not, anneal and flatten it more with the stationary planishing hammer.
Now for the tabs. First, you have to select a gauge metal that you can easily press over your enamel. We happen to have some thinner strip that (at best guess) is around 22 gauge?
I try to clip the strips at the same length with my nips. I use the nip hinge point as a reference. I am going to use four tabs but you could use three or more.
Once you have cut your strips, find a flat soldering brick and hammer your tabs in around your loop. I have found that with soft fire brick you can almost shove them in by have or with pliers.
Try to create some tension with the tabs in order to pin down your frame.
Test fit your piece along the way to make sure it fits.
You may have to flatten the tabs before you hammer them into the brick
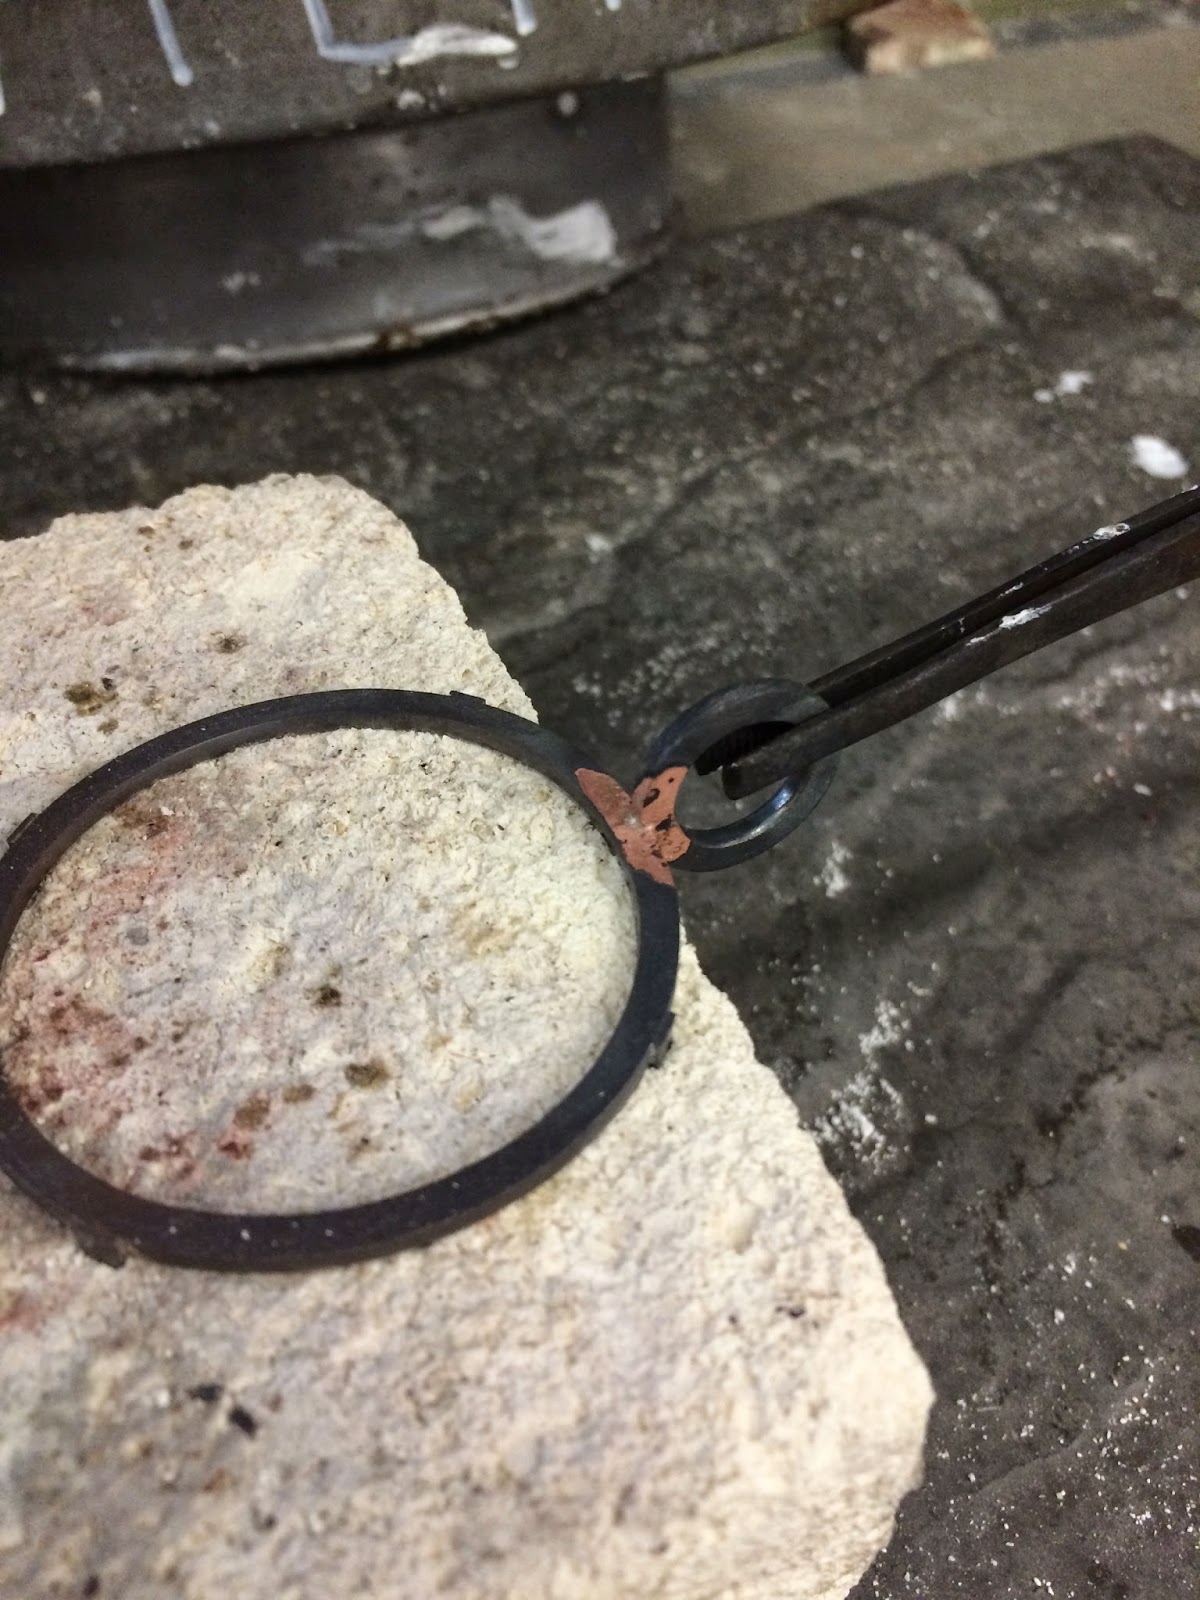
Flux your tabs and push over your tabs in order to lock them in place. It is too be noted that this is the back or the side that will be seen. We will cut the tabs flush on this side.
When soldering make sure to use indirect heat to solder the tabs in place (see image below). Notice that I am not point the flame at the piece itself and using reflective heat. I would use tiny chips of medium solder.
Once soldered, wait a bit and carefully pry up your frame using a pair of tweezers. Remember that your frame is annealed and that it may bend if you pry it up too hard.
Pickle your piece and check all of your seams to ensure the solder has flowed to the appropriate parts.
Use a sharpie to mark the height of the tab and cut all the tabs using heavy nips or sprue cutters.
Cut the back side flush with the frame. The tabs can be slightly proud of the frame. We will sand this down later.
Sand the tabs flat on the back side
Check your fit!
I don't like anything to snag so I file the edges of my tabs to be rounded.
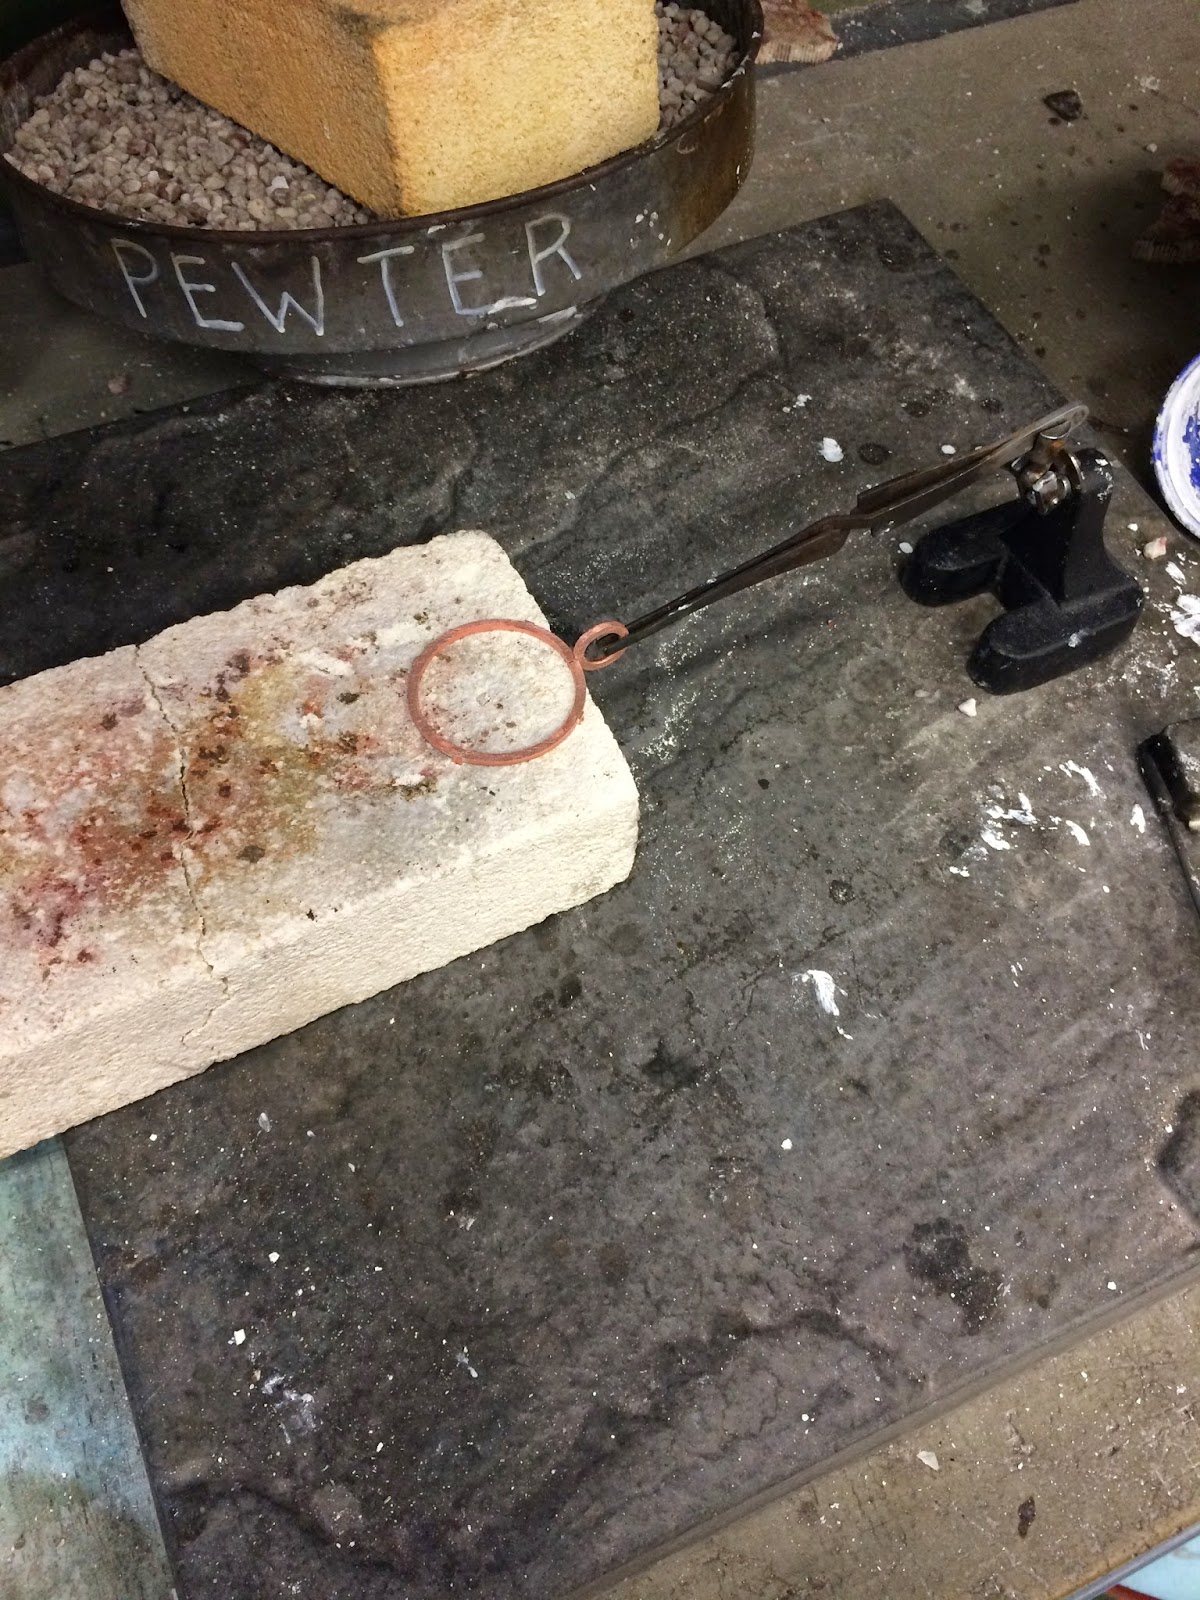
Next we are going to make our bail. The bail will be what we are going to send our chain through. Obviously we wont need a bail if this is a badge. I like being consistent with the gauge metal I use so I used the same square stock. Truthfully I think I made it way too big but it is easier to see for the demo so I ran with it.
Grab a jump ring mandrel and wind the square stock as tight as you can get it (again, I should have made it tighter in diameter).
Cut your ring using a jeweler's saw blade.
In order for you to get a super flush seam, I often re-cut the seam with the jeweler's saw. I will thread the blade in the and cut out from the center multiple times in order to ensure that seam is super flush before soldering.
Again to get the twist out of the bail hammer down on the edge to coax it back to square.
Use the planishing hammer to flatten the ring.
Sand the ring flush
Use a sharpie to mark the thickness of the frame and your jeweler's saw to rough saw out a groove.
I found a square file that was the same thickness of the frame. I used this to file the groove to solder the bail to the frame. You don't have to file a groove but it helps strengthen the seem.
When you get ready to solder the bail on, I hammer the tabs back into the brick to the edge where I am going to solder the bail is sticking out.
Use a third hand to hold the bail in place. Make sure to check all sides in before you solder to ensure alignment.
Use the jumpring mandrel to straighten the bail.
You may have to file away the bail a bit in order for the enamel to fit.
We will set and patina the piece next class.
Animated gif below.


